
In an earlier blog post, I demonstrated a way to insert a hierarchical XML document into a relational table structure by using XQuery. That solution works well in smaller solutions, but it’s a “code only” solution that can become complex and hard to maintain in larger projects.
An alternative solution would be to use the graphical mapping tool Mapforce from Altova.
I’m going to use the same source XML and target SQL as in the previous blog post.
The source is the following XML document containing invoices and invoice rows (download the document here but change the file type to .xml):
<Invoices>
	<Invoice>
		<InvoiceNumber>991001</InvoiceNumber>
		<InvoiceDate>2013-12-19</InvoiceDate>
			<InvoiceRows>
				<InvoiceRow>
					<Product>PROD1234</Product>
					<Amount>1000</Amount>
				</InvoiceRow>
				<InvoiceRow>
					<Product>PROD5678</Product>
					<Amount>100</Amount>
				</InvoiceRow>
			</InvoiceRows>
	</Invoice>
	<Invoice>
		<InvoiceNumber>991002</InvoiceNumber>
		<InvoiceDate>2013-12-20</InvoiceDate>
			<InvoiceRows>
				<InvoiceRow>
					<Product>PROD1234</Product>
					<Amount>2000</Amount>
				</InvoiceRow>
			</InvoiceRows>
	</Invoice>
</Invoices>
The target is the following SQL Server tables:
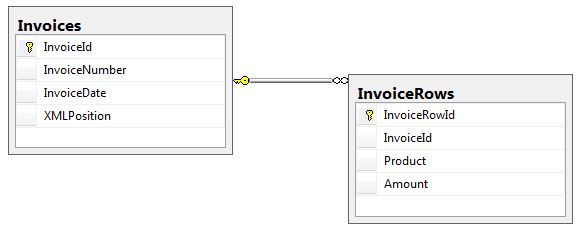
The sql script that creates the database can be found here.
An evaluation version of MapForce can be downloaded here. The download is the so called MissionKit package, which is a bundle of more software than just MapForce. Among those XMLSpy, a XML editor that is a favorite of mine.
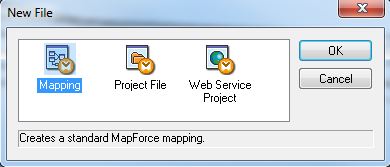
Once downloaded and installed, create a new Mapping. File -> New:
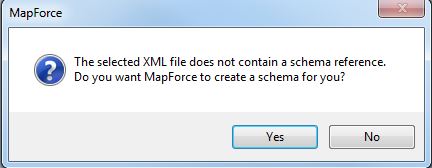
Add the XML document to the solution by selecting Insert -> XML Schema/File from the menu. Since we selected a XML file and not a schema, MapForce will ask if you want it to generate the schema for you:
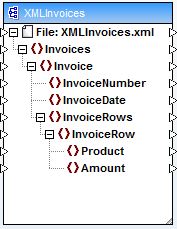
If you already have a schema file, select the XSD instead. Once loaded, the XML source schema can be seen in the workspace:
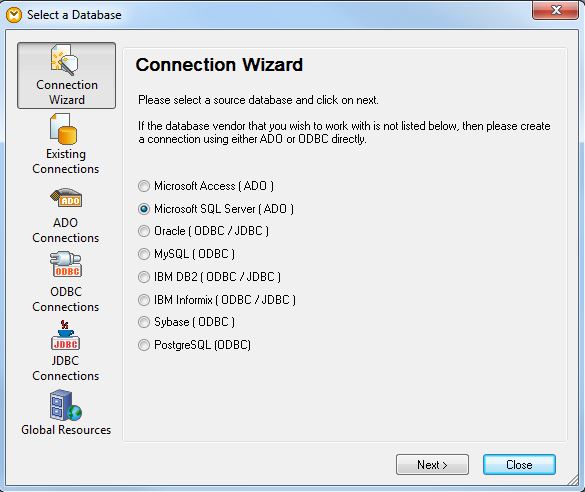
The next step is to load the SQL Server target tables. Select Insert -> Database and select Microsoft SQL Server in the wizard that opens and press Next:
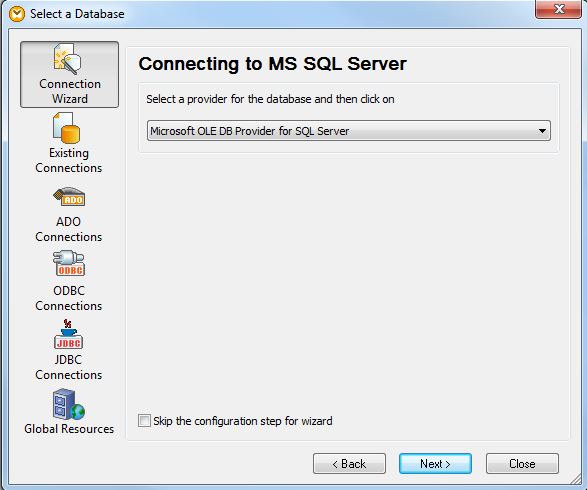
Select Microsoft OLE DB Provider for SQL Server on the next screen:
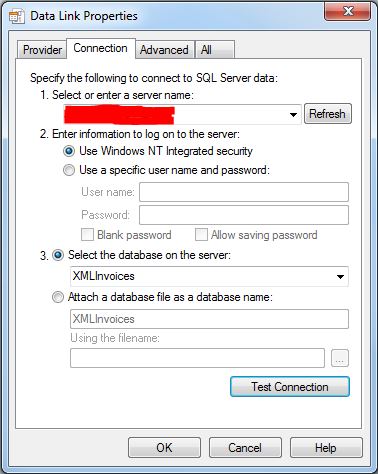
On the next screen, create a connection to the XMLInvoices database and press OK:
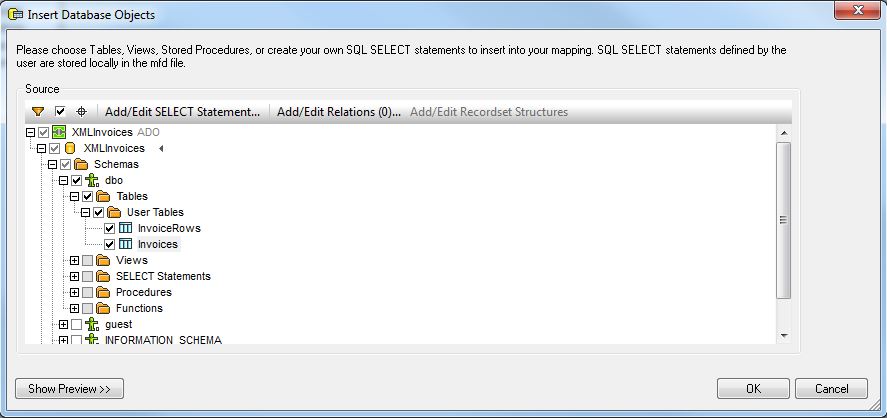
This will open the Insert Database Objects window. Check the Invoices and InvoiceRows tables to import them to MapForce, and press OK:
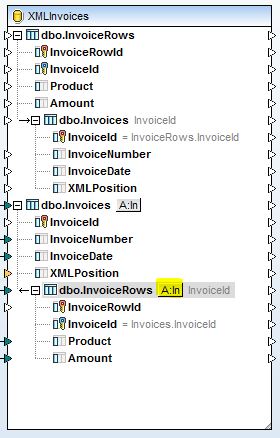
The tables are displayed in the workspace:
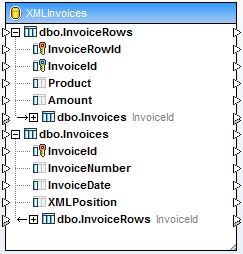
The first thing we need to do is to map the Invoice and InvoiceRow XML nodes to their respective tables. Drag a connection between the nodes and tables as shown below:
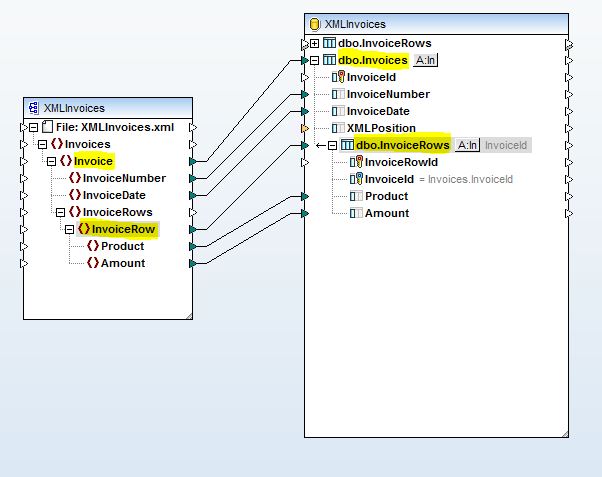
Since the element names match the column names in the database, those mappings will be done for you automatically. Just drag connections between elements and columns as needed if the names don’t match.
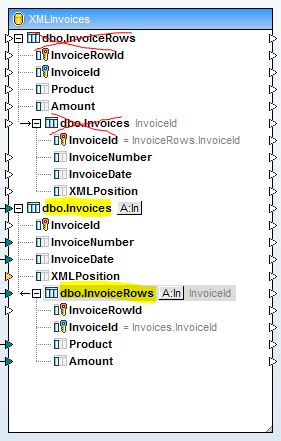
Also make sure you use the tables that has the parent child representation of Invoices and InvoiceRows:
To see the results of the mapping, select the Output tab:
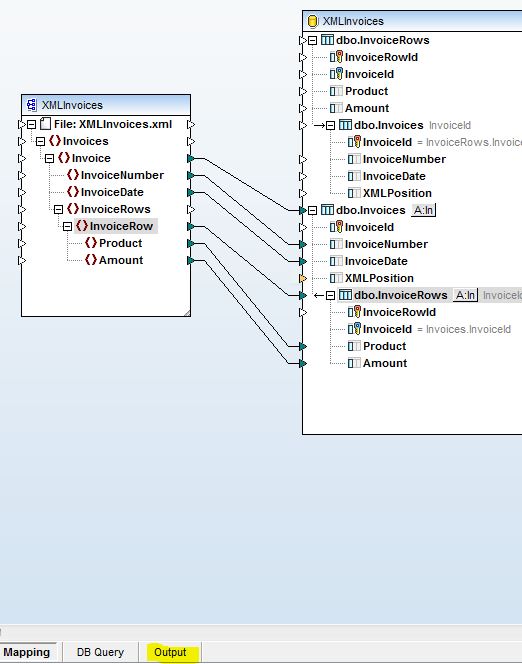
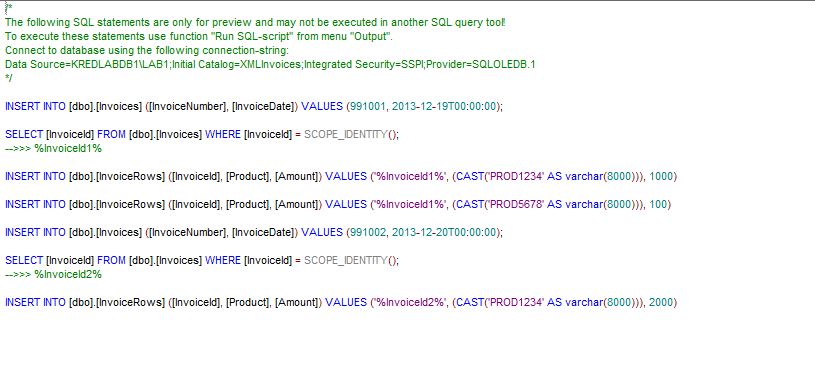
As you can see, the hierarchy is maintained in the resulting SQL script. To run the script, select Output -> Run SQL-Script. However, MapForce also has a powerful code generator. So if you want the code for reuse or scheduling, select File -> Generate Code in…
To see how the hierarchy is controlled, select the little button next to the table name InvoiceRows:
This opens the Database Table Actions window. As you can see, Mapforce has recognized that there is a relation between the tables to maintain, and has automatically selected the correct action for new rows:
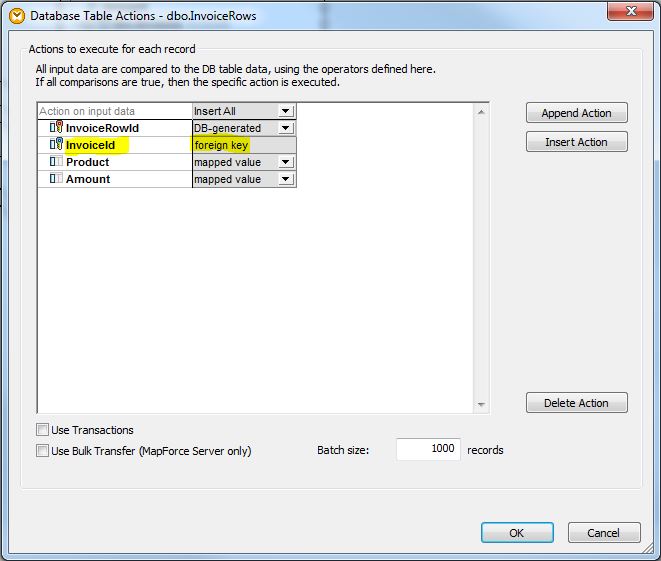
The default behavior is to always insert new rows. But if your requirement is that already existing rows are ignored or updated, this is where those actions can be defined.